

Kneedle Knight
Project Summary:
Game Genre: 3D Puzzle Platformer
Engine: Unreal 5
Development Time: 4 Months
Team Size: 21
Kneedle Knight is a 3rd person puzzle- platformer game. The player assumes the role of a mouse knight, utilizing their needle to sew onto 2D surfaces and overcoming platforming challenges by seamlessly switching between 2D and 3D worlds.

My contribution:
Level Design / Level Art
-
Designed the initial prototype level to showcase gameplay mechanics to the stakeholders.
-
Designed and implemented two areas in level 1.
-
Designed tutorial area to teach basic gameplay mechanics.
-
Worked with programmer to polish the rotating cube puzzle area in level 1.
-
Used modular kits to build and finalize the level aesthetics.

Design Highlight - Level 1 Tutorial Area
Level 1 Room 1: Teaching the basic mechanics
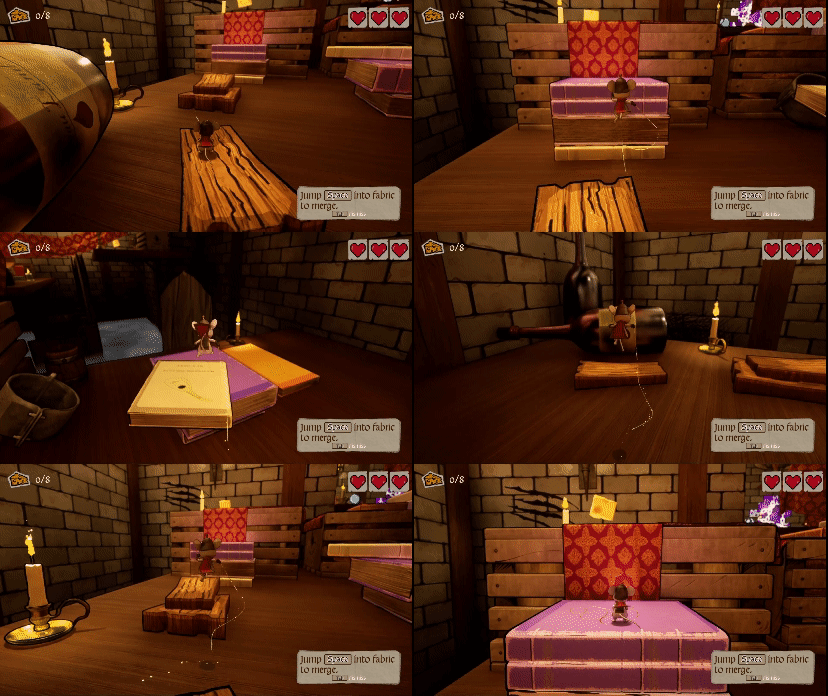
I was responsible for designing the starting room in the game. In order to teach the player movement mechanics and prepare them for harder challenges, I used following techniques to make the learning process easier:
#1 Start the level with a safe practice zone
I designed a safe starting area for the player to practice moving and jumping without worrying about failure/penalty. Comparing to the more linear level design later in the level, these safe open areas helped players ease into the platforming mechanics.
#2 Mandatory Teaching Moment
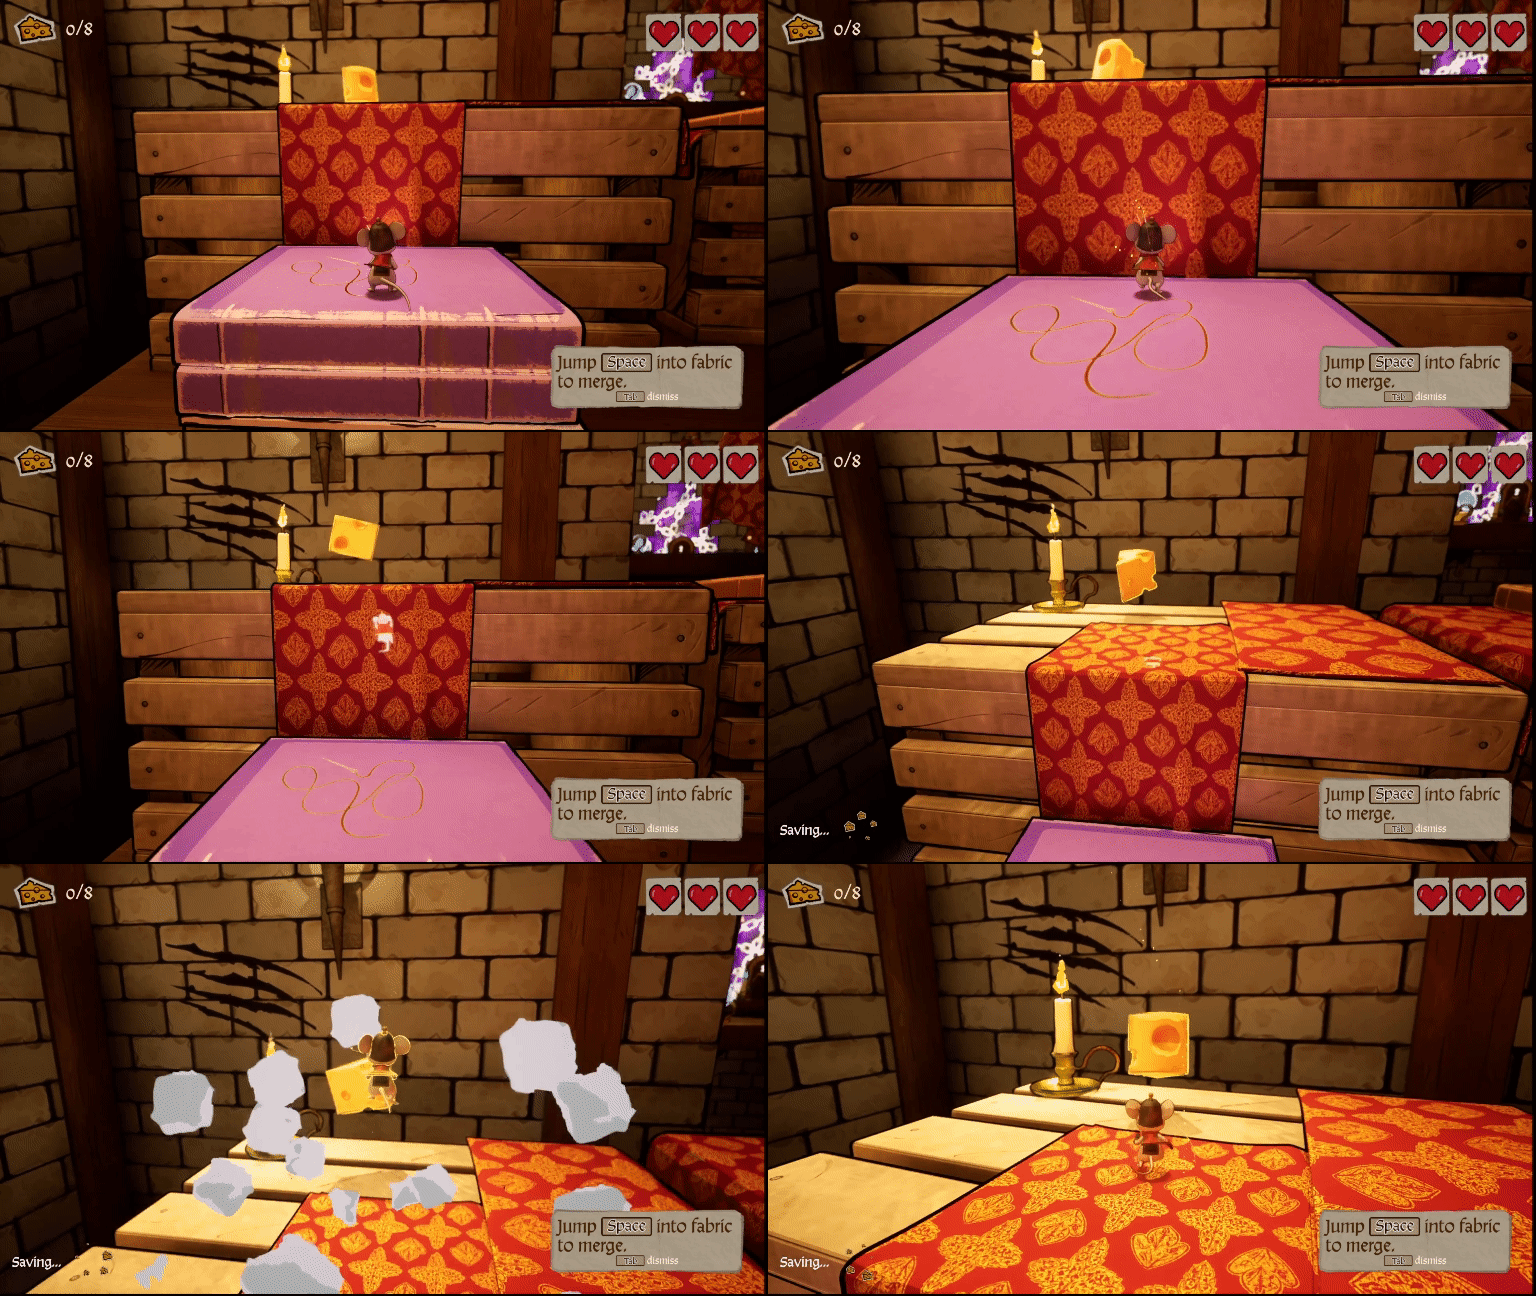
Though the player is free to explore the begining area, they have to learn certain mechanics before proceeding to the next area.
In this example (left), the player must learn the Merge mechanic to proceed. They need to use it to climb fabric and reach the top of a box, which is too tall to jump onto using stacked books.
.png)
#2 Teach metrics using platforms with various heights and sizes
I varied the shapes and heights of stacking objects to teach players which ones are viable platforms.
In this image, all objects are usable as platforms except the standing book - which exceeds the player's maximum jump height. The wooden plank bridging the books shows the minimum width of a safe platform for the player to cross without falling.
#3 Leading Lines
I also placed assets in a way that lead the player's eyes to the objective. In this image, all objects nearby are pointing the player towards the collectible cheese.

# 4 Clear Objectives
I placed level objectives at obvious locations to ensure the player understands the objectives. In the image below, all 3 objectives in this room - the exit door (left), the key to unlock the door (middle) and the optional cheese (right) can be immediately seen by the player once they enter this area (on the critical path).


Design Highlight - Level 1 Puzzle Room
Level 1 Room 3: Introduce, Reinforce and Master
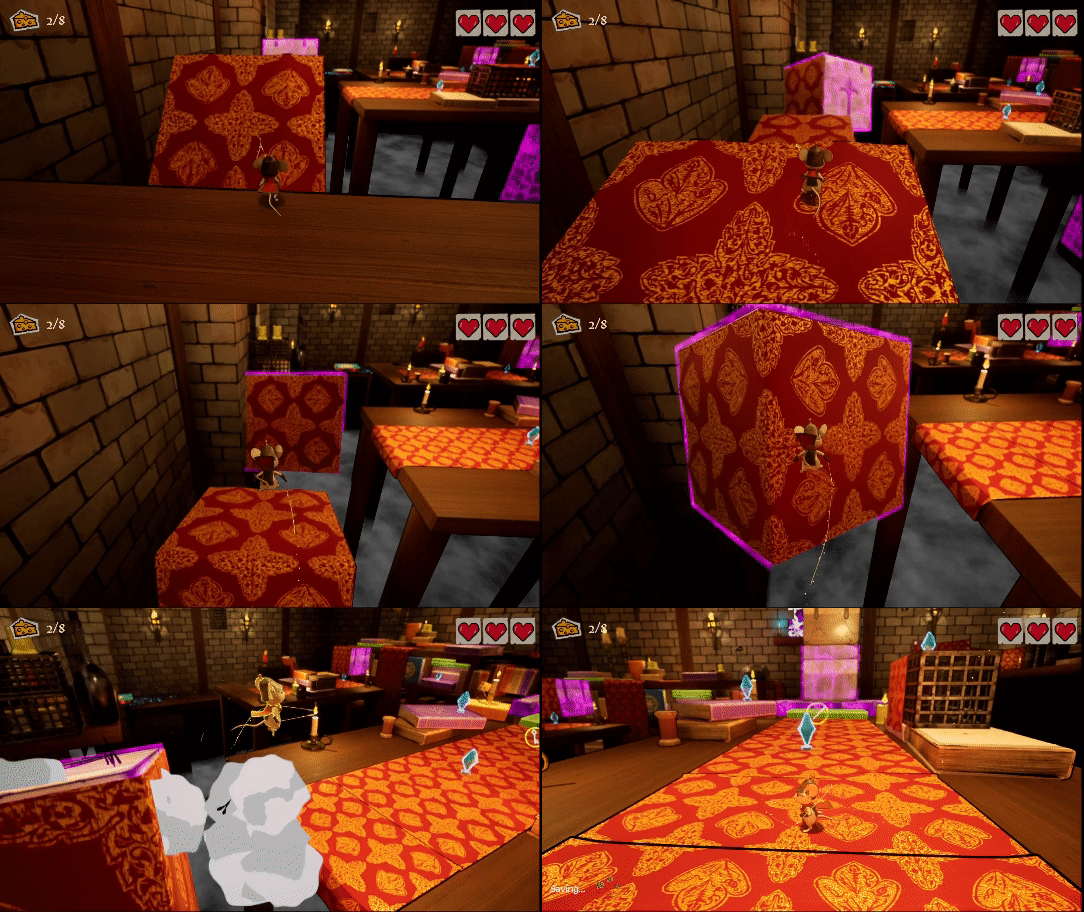
I was also responsible for designing the 3rd room in level 1. This room is centered around the mechanic of rotating platforms. To better showcase the mechanics in depth, I explored ways to use rotating platforms for both platforming and puzzle challenges.
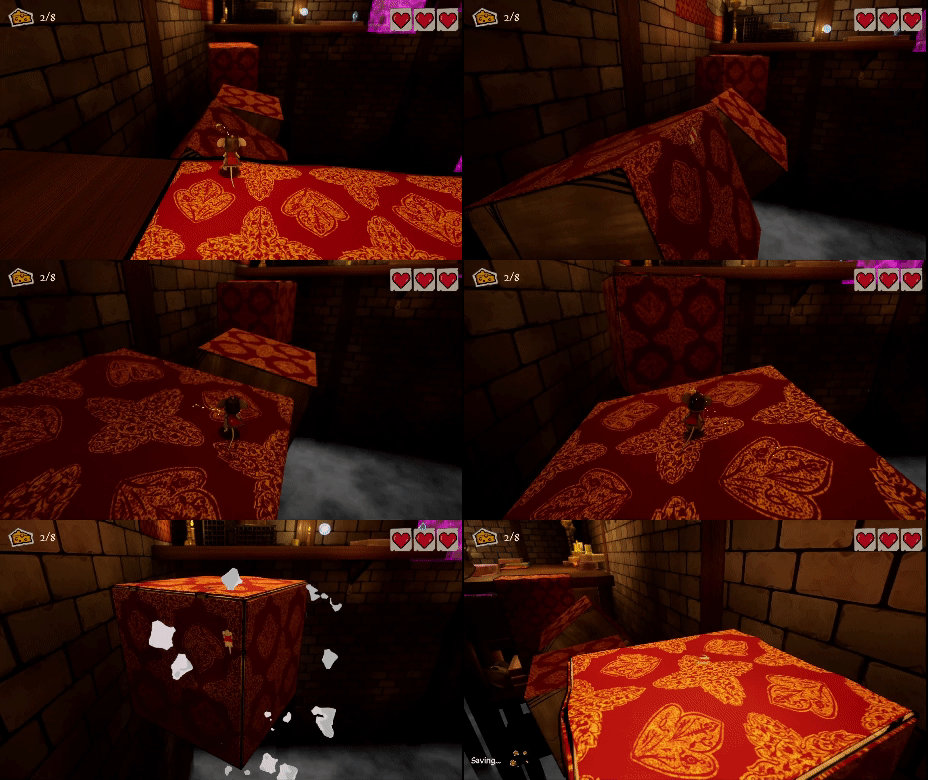
Introduce the mechanic through an easy challenge
First, I introduced a simple rotating platform challenge with minimal risk. The initial platforms rotate at 45-degree angles, making it unlikely for players to fall even if they don't merge into the fabric.
Reinforce the mechanic & increase the difficulty by combing multiple elements
After the player passes the first challenge, I introduced another rotating platform challenge with new twists. Now, the platforms can only be activated by a switch, and the player must merge onto the fabric surface to stay on them.
Test the player's mastery in a high-risk scenario
For the 3rd challenge, I raised the stake of failure to test the player's mastery.
They had to jump through three cubes rotating at 60-degree angles without any flat surfaces to land on. Success required precise timing to merge onto each rotating cube. Missing a jump meant falling into a bottomless death pit.
The Final Challenge - Rotating Pillar Puzzle
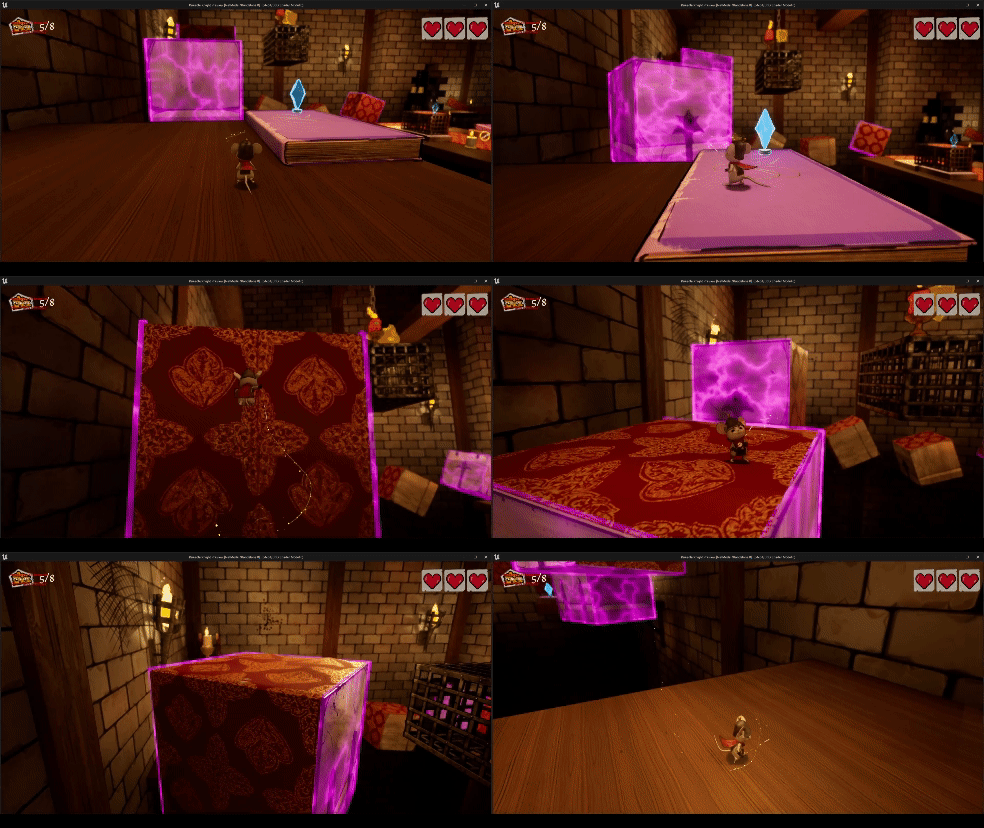
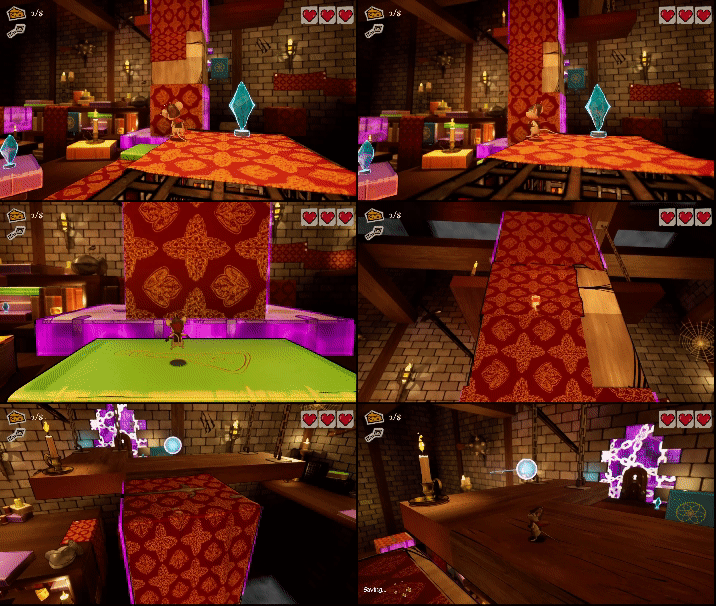
Since all 3 rotating platforms challenges are focused on platforming, I decided to introduce a new challenge that utilizes rotating platforms for puzzle solving.
4 Steps Puzzle Design
To design this puzzle, I applied a 4 step puzzle design technique introduced by Asher Einhorn in his Gamasutra blog.
Step 1: Make sure the player understands the objective.
I placed the exit door behind the pillar for immediate visibility upon entering the puzzle area. The key is also placed along the critical path, reminding players of its use to unlock the final door.

Step 2: Make sure the player identifies the puzzle.
The puzzle involves reaching the upper platform by using the pillar as a ladder. I positioned the pillar in a way that makes it easy to associate with the hanging platform above.

Step 3: Make sure the player identifies the tools needed to solve the puzzle.
Because the crystal switches and the switch-controlled rotating cubes (tools) were used in previous challenges, players should easily recognize them. Once they understand they can create a flat fabric surface on the cubes by rotating them with switches, the puzzle is almost solved.

Step 4: Ensure the execution steps are easy once the player solves the puzzle mentally.
After the player figures out the puzzle solution, executing the actions should be straightforward. There are no additional platforming challenges between the steps to ensure the player is instantly rewarded upon completing the puzzle.

Postmortem
What went well?
Co-designing level 1 with another Designer
I collaborated with another designer to create Level 1. Together, we created a skill progression chart and assigned mechanics to the four areas accordingly. Each area has a clear purpose, contributing to Level 1's cohesive vision.
Adapting to game design changes
During development, game mechanics evolved, with several scrapped and replaced. As a level designer, I adapted by creating various action blocks for each version, remaining flexible rather than rigidly adhering to my initial design.
What went wrong?
Environmental art asset placement affected level design
Due to an initial lack of communication with the artists. There're some asset placement that created shortcuts for the player to bypass the puzzles.
Adjusted level layout to fit with modular kits and existing assets.
The initial blockout was not built using modular kits, the size and even design of certain areas had to be adjusted to make the modular kit snap together. We should have communicated with the art team prior to blocking out the level.
What I learned?
Communication with multiple disciplines is important
Building the level is a team effort. It involves proactively communicating with artists and programmers early and consistently to keep everyone on the same page.
Being flexible & open to changes
Adapting to design changes as I go, not becoming attached to a single idea, and understanding that game development is an iterative process.
